Showing posts with label princess. Show all posts

Sunday, June 19, 2011

Fathers Day Gifts

I think my husband had a good Father's Day--he smiled a lot, at any rate! The children made him (with my help) a handprint tie and they were so proud when he wore it to Mass. They have also insisted that he wear it to work on Monday. I think this will be the first time he has worn a tie to the office! I found the tie idea on The Littlest Crafter and loved it! Basically you just take a white tie and use fabric markers (mine are Crayola brand and I bought them at Michaels) to trace your children's handprints on the tie. Easy-peasy!
We went to Mass in the morning (and brought Father David cookies and Father's Day cards--he loved them!) and then out to lunch. After lunch my husband finally had time to thoroughly look at more of his gift. I had each child fill out an interview form that I printed out from Big D & Me and they had some great answers. Apparently my husband is 9.5 feet tall and is robbing the cradle because he is 4000 years old!

Happy Dada Day (as we say in our house!) to all the fathers out there!

Monday, June 13, 2011

First Communion


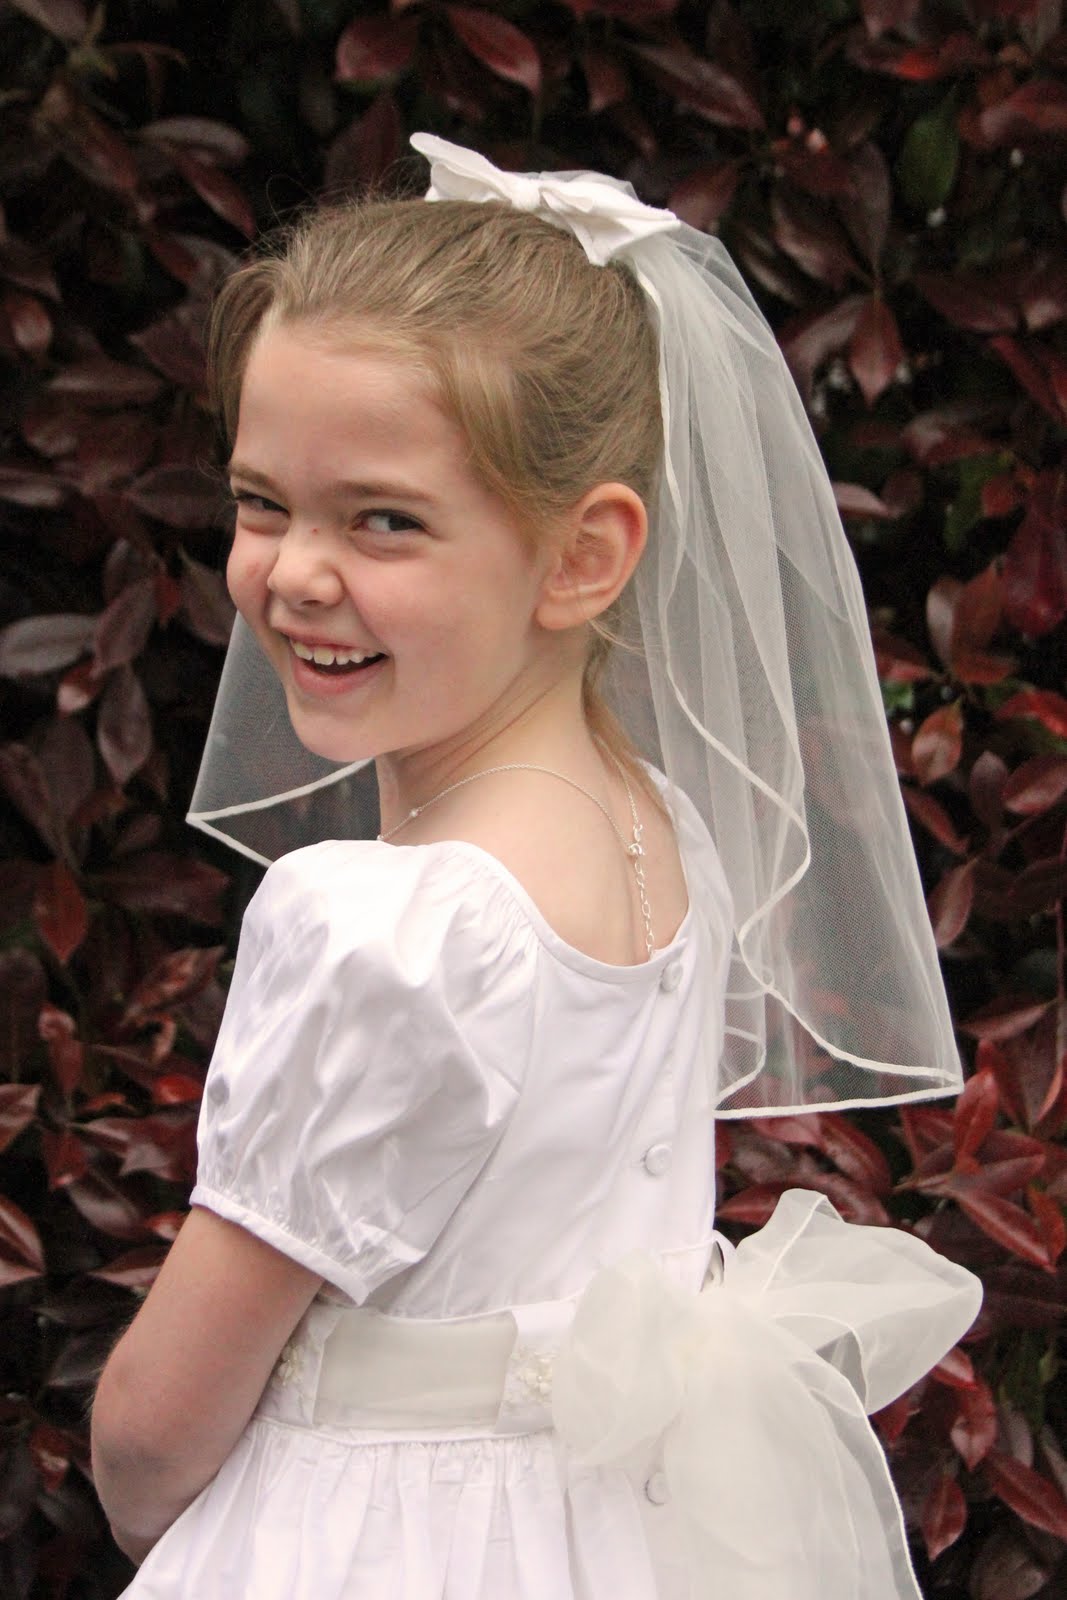
Last month my daughter celebrated her First Holy Communion. She was doubly blessed because she celebrated twice! Of course only one was truly her "first" First Communion, but she wore her white garments for both.
Our parish priest celebrated the First Communion Mass and he is the same one who baptized her, so that made it extra special. She did a good job with the big chalice, too!
The following weekend, her school had their First Communion celebration and she was invited to celebrate again with her classmates in that parish. Although it was still a Catholic Mass, it was a very different sort of celebration (it was a dedicated First Communion Mass rather than having the celebration integrated into the regular Mass the way our parish does it) so it was interesting to see the differences.
My sweet girl looked beautiful on her special day. She wore a silk dupioni dress from Strasburg Children and I had her veil custom made by the woman who made my wedding veil. It is a child-size version of my wedding veil. Perfect for my bow-loving little girl who really really wanted to wear Mama's veil (that was too big and that was the wrong shade of white).
I bought her this beautiful rosary from Etsy...and, my favorite, a beautiful little clay bowl to keep it in.
This bowl is gorgeous and was packaged SO beautifully! It is personalized for my daughter so I can't show the details, but click over to Etsy to look at the shop for Clarey Clayworks. They make beautiful bowls for all sorts of occasions and will personalize them. It is just lovely and perfectly holds her new rosary.

Friday, April 22, 2011

Tulip Fields


As usual in the spring, life is crazy around here. We took a break from the craziness last weekend though and took a trip to visit the beautiful tulip fields.
Luckily the weather cooperated and we had a break in our cold weather and pouring rain--it was actually sunny and in the 50s for a change! We enjoyed the sunshine and the beautiful blooms.
My daughter wore all her tulip gear--including her tulip sunglasses, sweater, and tulip turtle shirt! We've gone to visit the tulips every year since she was four months old and she has always worn tulip themed clothing from Gymboree. I'm going to be sad when she no longer wants to "dress the part" and match the flowers!
No tulip themed clothing for this little guy! He was happy to wear his froggy boots and look at the flowers. He was not so happy about the port-a-potty though--he's still complaining about that experience!
My last picture of the day is my favorite picture--and it is a genuine one. They adore each other and I adore them. (Yes, they do argue--but they really do love each other SO much.)

Thursday, March 17, 2011

Happy St. Patrick's Day!

Happy St. Patrick's Day from my little leprechauns!

Last night we had leprechaun pie for dessert and then this morning those dratted leprechauns tinted our milk green! Pesky little things! My five year old was not amused and next year he is determined to set leprechaun traps all over the refrigerator because he is tired of them doing that to his milk every year. Meanwhile my seven year old had to check all over our doors for leprechauns because she realized we have shiny doorknobs and leprechauns like shiny things. Alas she found no leprechauns hiding behind the doors.

subway art from eighteen-twentyfive

Have a great day--I hope the leprechauns don't play too many tricks on you!

Wednesday, March 16, 2011

St. Patrick's Day Teacher Gifts

Yesterday afternoon my little girl and I took some time and made a few small St. Patrick's Day gifts for her teacher and other key people at her school. I found a great tutorial for this project at Inspiring Creations and was able to find most of the supplies (except for the candy and little pots) in my stash of supplies here at home.
I mostly followed the instructions listed on the original blog, except I used a lollipop stick to hold up the shamrock (because I have lots of them!) and I didn't bother to glue the floral foam into the little clay pots, I just wedged it in there. The shamrocks are hot-glued onto the lollipop sticks and my daughter wrote little messages on a second green shamrock that I hot-glued onto the back of the stick.
Then we packaged everything up with a cellophane bag and tied with a gold ribbon and a cute tag (that I embellished with rub-on letters from my scrapbooking stash) and her little gifts are ready for St. Patrick's Day!

Friday, March 11, 2011

M&M Science Fair Project

Pardon the lack of blog posts this week, but I have been consumed by my daughter's M&M science fair project--which unfortunately does not involve me consuming any M&M's!!
My seven year old has put SO much time and effort into this project! She has counted, sorted, thought, written, erased, rewritten, and put hours and hours of work into her M&M project. Her school science fair is coming up soon and, based on the results of that science fair, some of the children will have the opportunity to represent the school at the state science and engineering fair. Princess is very self-motivated and wants to go to the state science and engineering fair.
I'm doing my part and being a supportive mama--taking pictures, typing up her drafts, and tracking down the materials she needs.
Really though, this project is hers and I'm thoroughly impressed with the amount of work she has put into it. She is the youngest child in her grade (because she skipped first grade) and her academic skills amaze me.
Now her scientific report is written and we're working on the display board--and it is oh-so-cute!

Tuesday, March 8, 2011

First Reconciliation

My sweet (squinty eyed!) girl made her First Reconciliation this past weekend and is thrilled to be one step closer to making her First Communion. She was the first child to make her confession and was so excited to use the confessional. She had the option of using the confessional with a visiting priest or sitting down face-to-face with the parish priest--who isn't our parish priest because she made her First Reconciliation in the parish where she goes to school rather than at our home parish. At any rate, she chose the confessional because she is fascinated by it. She didn't tell me what she confessed (and I didn't ask!) but she did inform me that her penance was to say one "Our Father".
After she was done, she made her First Communion banner (which has her name at the bottom--I attempted to clone it out in PhotoShop, thus the odd shadowing!) She will be making her First Communion at our parish church (with our priest who baptized her) and then the following weekend will be walking at this church's First Communion celebration where her classmates will be making their First Communion.

It is hard to believe my little girl is growing up! I ordered her veil today from the woman who made my wedding veil ten years ago!!

Sunday, March 6, 2011

Children's Reading Area

old family room and toy closet/play area
Prior to the spring of 2009, I had a very teeny tiny family room to go along with the teeny tiny bedrooms for my children. At a loss for what to do for extra space for my children's toys, I ended up turning a little used closet under the stairs into a toy closet for them.
old family room and toy closet/play area
They loved the space and it was a wonderful way to expand their play area without the expense of building onto our home. Fortunately in the spring of 2009 we were able to bump out the back wall of our family room and kitchen area. We added approximately 270 square feet to our house. Not only did this give us a larger family room, but it also enabled us to seat our entire family of four (plus a couple of guests!) at our kitchen table. This gave me the chance to move all of the toys OUT of the family room and into the room that had been the dining room. Moving the toys in addition to building the addition really made the first floor of our house feel bigger! (We're still stuck with teeny tiny bedrooms though...but at least they don't have many toys in them!)

After moving all of the toys, the toy closet ended up unused for over a year. Actually, it ended up being the place where I shoved all the stuff I needed to donate to charity. Finally I decided to reclaim it as a reading area for my children.
The little pink chair in the doorway is one I found in my old room at my mom's house. I think she bought it at Ikea fifteen years ago! I tossed a pillow on the floor as well as my children's Pillow Pets. (As an aside, I love having a "home" for these Pillow Pets! I'm big on toys having homes.)
I put Golden Books in a basket on the floor and put picture books in the book sling shelf along the back of the closet. The only item I bought for this reading area is the book sling I purchased from Amazon (it is by KidKraft and I paid around $50) but there are different versions at multiple retailers. Just like the rain gutter book shelves I put up in my son's room, I think it is great to have bookshelves that allow children to see book covers.
My children were so excited when I showed them their new reading area! They call it "The Book Nook" and love reading in there. It is a cozy space that they can make as snug as they wish. I love providing different areas for my children to read and this one definitely is proving to be a favorite of theirs.

Linking to Sanctuary Arts at Home's Refresh Your Room

Tuesday, March 1, 2011

Stained Glass Cross Craft Tutorial


Last week I was looking for a fun craft for both my children and decided to have them make stained glass crosses. We had all the supplies on hand--tissue paper (that I cut into squares), clear contact paper, and black paper (that I cut into two cross outlines per child).
I taped down a section of contact paper (sticky side up!) for each child and put down a cross outline. Each child also received an individual bowl of tissue paper squares. Taping down the contact paper helped keep their projects from moving.
My preschooler went for the random approach for his stained glass cross.
My second grader aimed to cover every exposed area of her cross.
When your child is done with their masterpiece, put the second cross outline on top of the first (to hide the spots where the tissue paper overlapped the first outline). Then put a second sheet of contact paper down--with the sticky side on top of the artwork to seal everything inside. The final step is to trim around the project.
Beautiful!

Visit Lenten Ideas for Kids at Catholic Icing, Someday Crafts, and Weekend Wrap at Tatertots and Jello!

Monday, February 28, 2011

Ballerina Birthday Party

My little girl turned seven in December and, to celebrate, we had a ballerina birthday party at our house. She has been in ballet lessons since she was three (literally--she won't even take the summers off, that is how much she LOVES ballet and dancing!) and currently her career aspirations are wavering between fairy princess and ballerina. Oh, to have such sweet dreams!
I made her invitations using supplies I purchased at Michaels craft store. I was heavily influenced by the sweet tutu invitation I came across on A Little Loveliness, but I adapted it to fit my own needs. I printed my invitation details onto pink cardstock. Then I sketched a basic leotard shape and made a pattern that I then traced onto my pink cardstock and cut-out all of the invitations. I used a small hole punch (that happened to be a small heart hole punch) and threaded a length of pink tulle back-and-forth through the bottom of the invitation to be the skirt of the tutu. At the neckline of the leotard I used a string of stick on faux pearls from the scrapbooking section of the craft store.
I absolutely LOVE the ribbon canopy over the party table. The credit for this design goes to Glory of Glorious Treats. I came across a picture of a party she did for her daughter and knew I had to do the ribbon canopy for my daughter. It was AMAZING and my daughter and I both loved the effect!
Look how pretty all those ribbons are! My husband built the framework for me out of some inexpensive wood and he and my preschool son painted it white. He screwed little eyehooks into it so that we could hang it from the ceiling per Glory's instructions. Then, one night after the children went to bed, we hung it from the ceiling using 3M Command Hooks--the ones with the little silver hooks. I tied all the ribbons on after it was already up on the ceiling. It took a LOT of ribbons!
I put the girls' tutus on their chairs. I bought these from Halo Heaven for less than $2.00 each! (I had a coupon code, so it was even less than the price on the website.)
The runner on the table is wrapping paper from Target. On the center of the table I put out some sweet treats for the girls. In the milk glass container I piled up pink strawberry Whoppers and I used the curvy edges of the container to hold the candy dipped marshmallow pops. (They're just like the ones in this post from 2009.) There also are small containers of strawberry dipped Pocky sticks. The cupcakes are on inverted wine glasses from the Dollar Store. I bought those glasses last year for my daughter's Fancy Nancy birthday party. The ballerinas on the plates were cut with my Cricut.
In the family room I had craft stations set up--ballerina coloring pages on the coffee table and a second table with supplies for making ballerina clothes pin dolls. We also dressed up the American Girl dolls in ballet outfits for the occasion! And, as you can see, I made a lot of tissue paper pom poms to hang from the ceiling. I love the visual impact this gave the space! Much more impressive than the streamers I've done in the past. Plus the heavy dose of pink helped to take away from the Christmas decorations that I also had going on (this was December, after all!)
When the girls first arrived at the party, they socialized and colored ballet pages that I printed off the internet. Then they made these clothespin ballerinas. I had the supplies all organized for them in tin soup cans that I tied tulle around. The ballerina pictured here is a sample one that I made. It was really helpful to make a sample as it forced me to streamline the process and simplify things a bit.
Next we had a ballet lesson from one of the senior company ballet girls from our dance studio. So exciting! She really worked those girls--it was fun to watch them! At the end of the mini lesson she got out her pointe shoes and those little girls were in awe!
Next we did "pin the bow on the ballerina". Not exactly a traditional ballerina game, but it works for us as my little girl ALWAYS wears hairbows! I found this cute clipart image of a ballerina online and it was simple enough that I was able to freehand it onto some posterboard. I gave each girl a bow with her name on it and stuck a piece of tape on the back of it. After that we played "pass the parcel" before letting the girls make their own ice cream sundaes.
Then it was cupcake time! (And in the background of this picture you can almost see a party decoration that I forgot to get a good picture of...big ballerina cut-outs done on the Cricut that I hung in the windows on clear thread...they moved/danced every time the heat came on and whenever anyone walked by. It was very neat!)
Happy Birthday, Pumpkin Pie! I love you now and forever!

I'm linking to Whatever Goes Wednesday at Someday Crafts, Friday Favorites at Inspiring Creations, and Hookin' Up with House of Hepworths!

Friday, February 25, 2011

Teacher Appreciation Door Decorating

Yesterday I talked about the gifts my daughter gave her teachers. Today I want to talk about door decorating. I've seen the idea of decorating classroom doors for teacher appreciation day online, but never in person--still, I was excited to bring this idea to my daughter's school this year. She attends a preschool-grade 8 school, so it was a bit of a challenge to make it work for all the grade levels, but I think we did it. The teachers LOVED it and were totally surprised by the doors.

The door pictured above is the door I decorated for my daughter's classroom. She is in a first/second grade classroom. I sent home flower petals with each child with a sentence starter on each petal for the student to complete. (My teacher is fun because... I like it when my teacher... ) Then the stem of the flower is made up of pictures of the children. The watering can says XXX showers her students with... and the droplets say patience, kindness, love, respect, and wisdom! Then I added a few cute little bugs to the picture (caterpillar, ladybug, dragonfly, butterfly, and a bee) and labeled them with the names of the specialists, the principal, the priest, and the office manager. It was a big hit and I had a lot of fun making it!
This is the preschool door--with the teachers names covered for privacy. The "A+" is on there because we also were celebrating Catholic Schools Week and the theme was "A+ for Catholic Schools". I forgot to take a picture of the kindergarten door, but it was covered with shiny stars and pictures of the children. Really bright and colorful!
This was the 3/4th grade door (with a lot of sunlight shining in on it from the stairwell!). I had to erase the initials of the school and the name of the teacher. What I really love about this door is that the room mother had the students AND the parents get involved. Each of those handprints has writing on it with things the individual (some students and some parents) appreciates about the teacher. I love this idea!
Whoops! This mom forgot to measure the door, so we had to do some cutting and rearranging when we went to hang the door decoration after school. Luckily it all worked out! She had each child do anagrams at home of a word they would use to describe the teacher and she included those words in the definition that is printed at the top of the yellow part of the paper. Perfect for a 5th/6th grade classroom.

I didn't take a picture of the 7th/8th grade door, but it was a simple poster and the room mother gave me a gift bag with some cards for the teacher to be put on the door knob. It is hard to get those almost-high schoolers to want to be crafty!

Here are some other resources for teacher appreciation door decorating that you may find useful:
I'm linking up to Jen's Weekend WrapUp Party at Tatertots and Jello, Show Us Your Best at No Time For Flashcards, and Show and Share Day at Just a Girl! By the way, I'm still trying (desperately!) to win one of those handy-dandy Silhouette machines! The Domestic Diva has one she is giving away!