Friday, April 22, 2011

Tulip Fields


As usual in the spring, life is crazy around here. We took a break from the craziness last weekend though and took a trip to visit the beautiful tulip fields.
Luckily the weather cooperated and we had a break in our cold weather and pouring rain--it was actually sunny and in the 50s for a change! We enjoyed the sunshine and the beautiful blooms.
My daughter wore all her tulip gear--including her tulip sunglasses, sweater, and tulip turtle shirt! We've gone to visit the tulips every year since she was four months old and she has always worn tulip themed clothing from Gymboree. I'm going to be sad when she no longer wants to "dress the part" and match the flowers!
No tulip themed clothing for this little guy! He was happy to wear his froggy boots and look at the flowers. He was not so happy about the port-a-potty though--he's still complaining about that experience!
My last picture of the day is my favorite picture--and it is a genuine one. They adore each other and I adore them. (Yes, they do argue--but they really do love each other SO much.)

Wednesday, April 13, 2011

Wordless Wednesday: Artist at Work


Linking up to Wordless Wednesday at Angry Julie Monday--go check out the neat parking lot she photographed. I've never seen one like it before!

Thursday, April 7, 2011

Free Spring Crafts eBook

Allie from No Time for Flashcards recently invited me to have one of my crafts published in a great eBook full of spring crafts. Needless to say, I enthusiastically accepted her invitation! There are 25 crafts submitted by 15 bloggers in this great free ebook! Download your copy and get crafting!

Click here to download your free copy!

Wednesday, April 6, 2011

Easter Decorations

Despite a crazy weekend, I was able to get more of my Easter and spring decorating done--I showed you the mantel last week. Now if I could only get my house picked up too! This little vignette was inspired by the mossy vignette I saw over at Thrifty Decor Chick. I made my nest by putting paper lunch sacks through my shredder, my eggs are from JoAnn Fabrics, the mossy "rocks" are from Dollar Tree, and the sheet moss is left over from my bunny topiaries (more on those in a bit). Love this vignette and it looks great in my family room!
This colorful bucket of daffodils was constructed by my children two years ago and I love getting it out each year--it is such a fun pop of spring in the family room! I picked up the bunny at Goodwill last spring and spraypainted it white and he likes to sit right under the daffodils.
This is the art display in the playroom (click here for info on the vinyl and here for info on the display rack)--I finally took down the cute snowmen that my children made. Even though it is only 40 degrees outside, I'm determined to make it feel like spring inside the house!
I started off by making my bunny topiaries using bunnies from Pier One--they are mossy bunnies on a stick that cost about $2.99. Super cute and I've seen lots of versions of topiaries and crafty things done with them. I went for a simple topiary. Floral foam in a small clay pot topped with some sheet moss (cut to size) and then I jabbed my bunny stick (that I cut down just a bit) into the middle of the pot. I tied on a cute little pink bow and that was it! I love them!
In between the bunny topiaries I have one of my grandma's milk glass dishes filled with faux eggs. I have a number of milk glass dishes and containers, but my favorites are the ones that belonged to my grandma. In fact, now that I have a few (not many, but a few!) of her containers, I'm very close to getting rid of the pieces I picked up at thrift stores. The sentimentality of the family pieces means so much to me!
My living room is attached to the playroom (because the playroom really is supposed to be a dining room) so this next room flows right from the room with the piano. The table pictured above is right next to my couch. The subway printable came straight out of my inkjet printer and is from the girls over at eighteen25. I love their seasonal printables!
On the coffee table I have the same tray arrangement I did last year, including the glass pedestal I made out of a glass plate and candlestick. I get a lot of use out of that!
I also have these bunny themed Golden Books out on the coffee table for my little bunnies to read. They love it when I pull together seasonal book arrangements for them. I'm going to be sad when they outgrow this!
Here is most of the living room all decorated for spring. The messy playroom is off to the right...I shoved the excess mess out of the picture just for the picture. Isn't the little air hockey table under the window a nice touch? One of these days I want to build a console table for behind the couch, thus my barn stars are a bit high on the wall to leave space for the decor I'm planning to put on the table that doesn't exist yet. I like to plan ahead.

Ahh, spring is in the air!

Friday, April 1, 2011

Easter and Spring Decorating

I spent Wednesday putting away my St. Patrick's Day decor and getting out my spring decorations and Easter decorations. I'm still tweaking some areas, but the mantel and table are done...at least for now!
Last week I posted about the boxwood topiary I currently have on one end of the mantel. Adjacent to the topiary you'll find a small stack of vintage books from my mother's childhood (Nancy Drew, I think!) topped with a ceramic bird candle holder. At the other end I have an apothecary jar filled with twig balls (I think I bought those from Target last year) and there are two bunnies (from JoAnn Fabric) perched near the base.

As an aside, the art work on the wall is made from scrapbook paper and MDF--inexpensive and effective! Click here for more info! I didn't distress it or anything!
My children are in love with these bunnies I use in my decor each year. There is a girl bunny and a boy bunny, so of course they've named the bunnies after themselves. They like to have the bunnies on the table positioned in front of their chairs so they can watch the bunnies while they eat. This year I switched things up and added the container of carrots to the table.
I love these carrots! I bought them this year at Pier One and wasn't quite sure how I would use them, but I just couldn't pass them up. I ended up popping them into an apothecary jar and just leaving the lid off the jar since they were too tall for the jar. It works for me and they make me smile. A jar full of carrots isn't exactly my usual type of table decor, but I'm liking it.
Hopefully over the weekend I'll have the chance to finish up my decorating! I can't believe it already is April! (Update: I finished my decorating!)

Linking to: Spring Mantel Party at The Stories of A to Z

Wednesday, March 30, 2011

Wordless Wednesday: Junie B Jones

Wordless Wednesday--and this one speaks a thousand words to me!

Linking to: Angry Julie Monday

Tuesday, March 29, 2011

Monogram Button Pillow

I sewed up this easy pillow project yesterday and I'm so pleased with how it turned out. No tutorial because this project is all over the internet, but it really is very simple. If you've never sewn a pillow cover before, Cottage Magpie has a simple step-by-step tutorial that I've used several times with great results. This was my first time adding in the piping around the edge of my pillow and I'm mostly satisfied with the results. I do have room for improvement for next time though! (And apparently I should have ironed the front of my pillow. Whoops!)

I bought the buttons for my initial at Saint Vincent de Paul (they have a huge bin of monochromatic buttons) and drew a letter on the front of my pillow with a sewing pencil. Then I just sewed buttons on as I went. No fancy layout or anything like that. Except for cutting out the fabric, I did all of this yesterday--it really was a quick and easy project, nothing fancy at all!

I'm still deciding where to put it--I kind of like it here with my new ruffly pillows... At any rate, I'm really happy with the results!

Linking to: Hookin' Up with HoH at House of Hepworths

Friday, March 25, 2011

Ruffled Throw Pillows

Last week I bought two of these great ruffled throw pillows at Costco for only $13 each! They're super soft and the fronts are covered in ruffles. They also had them in a gorgeous plum color, olive green, and one or two other colors. They were available in the square shape that I purchased as well as an oversized lumbar (rectangular) shape. I wanted the lumbar pillow, but they only had one left in the cream and the ruffles weren't looking too great on that one.

The one downside to these pillows is that they are spot-clean only...but for only $13, I bought two of them anyhow.

Sorry for the picture quality, we've been having some overcast and gloomy days around here but I couldn't wait any longer to share these pillows. They are gorgeous!

Wednesday, March 23, 2011

Lisa Leonard


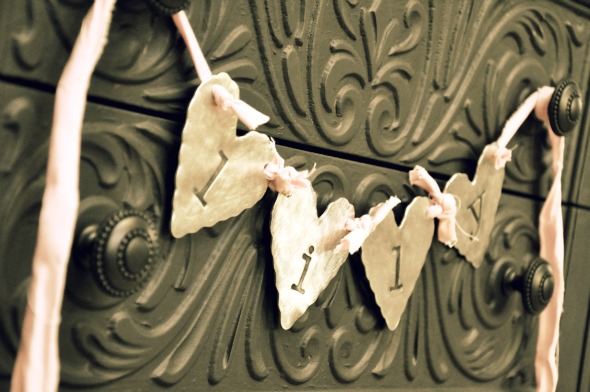
Lisa Leonard is one of my favorite jewelry designers. Actually, scratch that. She IS my favorite jewelry designer. I love her pieces and always have my eye on new items on her website. Currently she is introducing new decor items--and TODAY she is giving away an adorable pewter heart banner on her site. Click on over to enter!

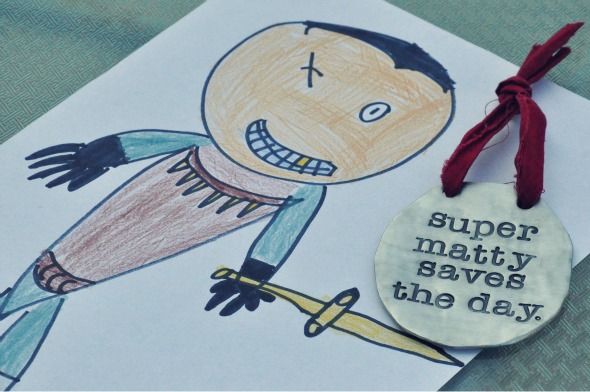
If you missed the heart banner giveaway on Wednesday, never fear! She is giving away oval wall hangings (your choice of engraved words) today, Thursday! Click here to enter!

I promise, you won't be disappointed! I own three of her necklaces and would be happy to own about ten more of them!

Tuesday, March 22, 2011

DIY Topiary

Look at this beauty I picked up for $4.99 at Goodwill awhile back! So springy and fresh--perfect for Easter!
Ha, ha! Really I just liked the container--it reminds me of tin ceiling tiles.

I quickly pulled off all the gnarly (never thought I'd use that word in a blog post!) faux flowers and revealed this anemic looking ball underneath. So much for using that for my sleek new topiary. It isn't exactly in scale with the base.

So I wrestled it off--and a few of the extra twig things came off too. At this point I shoved the whole thing in a corner and left it...for over a year. I picked it all up again this weekend and it came together really quickly--and cleared some stuff out of my craft area (which was my goal).

So, after my year+ long break, I took this styrofoam ball that I had in my craft supplies and jammed it onto the pointy stick that I had coming up out of my container. It went on pretty easily. I bought the faux boxwood garland a few weeks ago at Michaels Craft Store using a 40% off coupon and it cut apart very easily using regular scissors.

I dipped each cut end of boxwood into some tacky glue before sticking it into the styrofoam because I didn't want my topiary falling apart and becoming a craft fail after all this time. This was working pretty well for me, except I didn't like the glimpses of white you could see through the boxwood.

A quick an easy cure for the white styrofoam--paint it apple green! I got out my craft paint and one of my daughter's paint brushes and slapped a bunch of paint on my styrofoam ball. And by a bunch of paint I mean a bunch of paint. It went on easily but it sure did take a lot of paint. I probably should have used a green foam ball to begin with, but white was what I had.

I (mostly) let the paint dry and then kept on sticking the boxwood sprigs into my ball. It went pretty smoothly and dipping the sprigs in the tacky glue really made for a firm set for the sprigs. When I was done I checked my supplies to see what I could cover the base of my topiary with and I came up with some moss that I hot glued into place. I added a little bow and I was done!

I love it--and totally wish I hadn't taken a YEAR off midway through the project.
Right now I have it on my fireplace mantle, but I'm not sure where it will end up. I have some other plans for some Easter decor for my mantle, but for now this new topiary will do. Behind it you can see the wall decor I made with scrapbooking paper last spring.

And, since I'm not the first (or the last!) to fall in love with topiaries, here are some more ideas for you:

Miss Mustard Seed (a fluffy version of a boxwood topiary)
Tales and Trials (apparently we even like the same black and white ribbon!)
Scissors and Spatulas (find some premade boxwood balls and go from there!)


Linking to: